Friday 27 May 2016

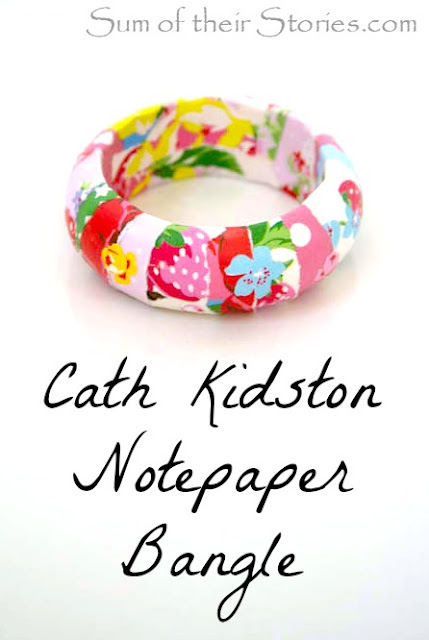
Cath Kidston Notepaper Bangle

I love Cath Kidston's beautiful designs so used some scraps of pretty floral notepaper to makeover an old bracelet.
Cath Kidston Notepaper Bangle makeover
About a year ago I was a guest over on The Pinning Mama with this tutorial, but when I wore this bracelet the other day and shared it on Instagram as part of Me Made May I thought it was high time I added it here too.
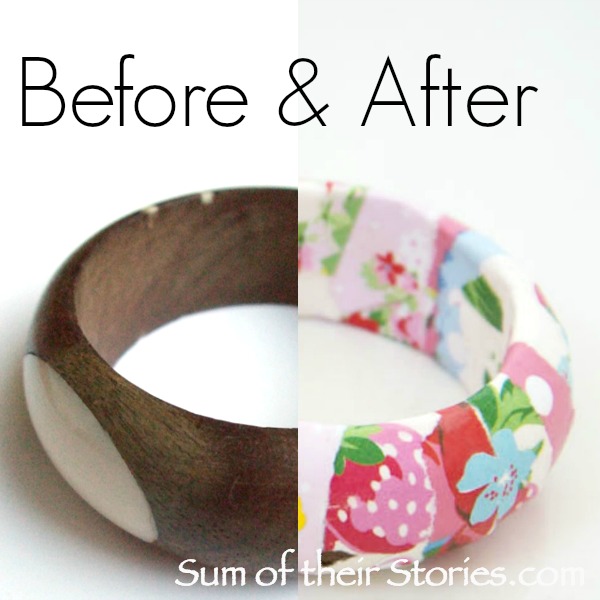
It all started when I fell over a wooden bangle in a charity shop for 50p.
old wooden bangle
Some of the cream coloured bits were chipped and the wood was a bit discoloured so it was perfect for a makeover.
My first thought was to cover it with comics, a bit like my pen pot
Then I saw something similar done with pages from a book, which was lovely, except I thought it would have to be a book I love and I just can't bring myself to ruin a book on purpose! It would only be ok if the book was already falling apart. What does it say in A Series of Unfortunate Events? - "there are few sights sadder than a ruined book". I'm not sure that is strictly true but still...
I found some old sheet music which might have worked but then I remembered I had some beautiful Cath Kidston writing paper.
I had already used a lot of this for other crafts, you can see the little scrappy bits on the left in the box. Perfect.
Do you want to make one? This is what you will need:
  • An old bangle
  • Scraps of paper
  • Mod Podge or PVA glue
  • Fine sandpaper
  • Spray Sealer (optional but highly recommended)

First I gave the bangle a quick going over with sandpaper, just to rough it up a bit.
Then I tore a load of the pretty papers into long strips.
I started sticking the strips onto the bangle with Mod Podge. I spread glue all over the bangle, stuck the paper on then spread another layer of glue over the top.
If any of the bits were more than 1 cm wide I gave them a few little tears sideways to make them curve round the bangle better. 
When it was almost all covered, leaving a gap of an inch or two I left it to dry hung up on a chop stick.
Cath Kidston decoupage bangle
Once it was dry (about an hour) I covered the gap with more paper strips and left it to dry again.
Whilst I was waiting I cut some flowers from more paper scraps using my craft knife. 
paper cutting flowers for a decoupage bangle
Then I glued them on any parts of the bangle that I thought were a bit plain or where there were any little creases to cover.
Once this was all dry I gave the whole thing a few layers of clear sealer spray.
spray sealer for a decoupage bangle
This stuff kind of stinks so I did this out in the garden.
You don't have to use the sealer but I've found I can wash my hands without having to worry about getting my bangle splashed. I've had this bangle a year now and have worn it often. This photo from instagram was taken just last week and as you can see, no peeling or damage at all.
DIY floral bangle
So on reflection I would recommend at least 2 layers of sealer of some sort if you want your bangle to last.

Cath Kidston Notepaper Bangle makeover

Cath Kidston Notepaper Bangle makeover

easy diy bangle update
Do you have an old bangle that could do with a pretty paper makeover? What kind of paper would you use?
All the top quality photos in this post were taken by our daughter, you can find her website here
You might also be interested in:
3 Pink Bracelets
3 Pink Bracelets
Cluster Drop necklace
Cluster Drop Necklace
Easy Bead Necklace
Easy Bead necklace
Fabric Twine Bracelet
I'll be linking up at these great link parties,

read more

Friday 20 May 2016

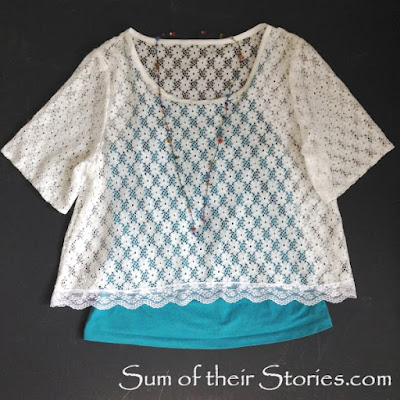
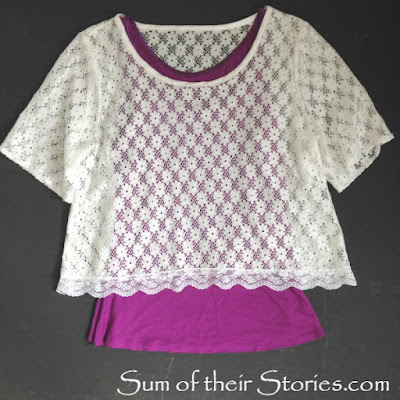
Another Lace Top Refashion

It's easy and quick to give a charity shop lace top a new shape and look.
Lace top refashion

When I was at the Stitches show a few months ago with a friend she bought a piece of lace fabric and used it to make herself a lovely floaty loose fitting lace top. Inspired, I found myself drawn to lace tops and dresses whenever I've been in a charity shop, in case I found something suitable to refashion my own version.
Finally I happened upon this top for just £2.99:
Lace top refashion
For some reason I've not photographed myself in it so you'll have to take my word for it when I say it was a little balloon-y round the waist for me, not the floaty, breezy look I was after!
It had 5 rows of shirring elastic round the sleeves and the bottom. At first I tried just snipping the elastic away on the sleeves, however this took forever, so I gave up on that and just chopped the elasticated bit from the bottom like so:
Lace top refashion
I found some lace in my stash...
Lace top refashion
and just attached it to the bottom edge, over lapping on the right side by about 1/2 inch. 
Lace top refashion
I stitched it using this stitch that I found on my sewing machine.
I believe this is really some sort of hemming stitch, but it worked well with the two layers of lace, enough of a variety of stitch to cope with all the holes.
Lace top refashion
I guess 2 rows of straight stitch would do the job just as well.
I tried pressing the sleeves with the iron, thinking I would just leave them at the 3/4 length but it just wasn't working so in the end I chopped off the bottom section of the sleeves too. I didn't have enough lace to edge the sleeves the same as the hem so I just gave that a simple double fold hem and stitched it with a normal straight stitch.
Lace top refashion
The only other thing I did was to carefully remove the black clothing label at the back of the neck. Why would you put a black label in a white lace top?
Lace top refashion
I normally consider myself a little bit past the "crop top" look (generally if you wore a look in your teens you probably don't want to be repeating it in your 40's!) but with a vest top underneath I'm loving my new lace top. 
Lace top refashion
This was the photo I shared earlier in the month on instagram as part of Me Made May 2016, when I took my new top out for a spin for the first time.

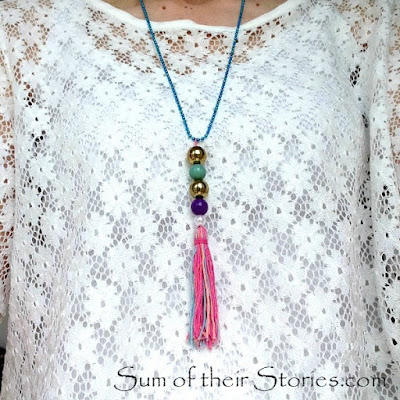
My tassel necklace was another Me Made thing (sort of) It was a bag charm originally, I didn't take any photos as I didn't think it was inspiring enough to warrant it's own post here but it was a little bit like this one:
The beads on mine are a bit less fancy and the puffy flower was yellow and had got a bit grubby, frayed & tatty.
I snipped away the flowers, removed the split ring and then just attached it to a bright bead ball chain I had already.
tassel necklace form old bag charm

I think the lace top will work with other colour vests underneath too.
Lace top refashion
Lace top refashion
Lace top refashion
I've seen lots of ideas on pinterest too, where people have made lace tops from old tablecloths or even curtains. If you can sew at all it would be easy enough to make a simple t shirt pattern from lace, but if you can find something suitable for a refashion a lot of the work (like setting the sleeves!) is already done for you - bonus!
PS: This is Another Lace Top Refashion because I added lace to a top a few years back, called that a Lace Top Refashion and I'm not very imaginative with my post titles!

I'll be linking up at some of these link parties, do check them out.

read more

Friday 13 May 2016

Cross Stitch Planter

The simplest of cross stitch to upcycle an old tin into a plant pot.
recycled tin cross stitch planter
I used to do a lot of cross stitch. I designed and sold a range of kits at craft fairs and had a few of my designs published in Cross Stitch magazines back in the late 80's/early 90's. Then I had kids, cross stitch went out of fashion a bit and that was the end of that! I made the kids samplers with their birth details but not much else since then.

I think cross stitch might be due for a bit of a revival. On pinterest I've been seeing quite a bit of really nice cross stitch again and as part of my post moving house sorting out ("why on earth did I keep this?" you know the sort of thing) I found some 14 count Aida. This is the big stuff for beginners with large squares. We used to use this at primary school to make coasters and other lovely gifts for our parents! It has 14 little squares to the inch, hence the 14 count!

Just as I was thinking that I may as well use this Aida fabric to make something, at work my boss finished the last of her tin of Yannoh. It's a weird (sorry) coffee substitute thing that she drinks but it comes in a nice tin with no sharp edges and an easy to remove label. It's a recyclers dream!

To make your own cross stitch Planter you need:
  • An old tin or container to cover (plain is best as any label will show through the holes in the fabric a bit)
  • 14 count Aida fabric or similar
  • Embroidery threads in your choice of colours
  • Needles, scissors, hot glue gun
  • Something to line your tin if it's not watertight
Remove the label from your tin if you can.
Cut the fabric to fit round your tin.
Using 3 strand of embroidery thread, stitch a design centrally on your strip of fabric. 
You can get the chart for mine here or just right click on the chart below and then print. 
You should end up with something looking like this.
simple cross stitch planter
Wrap the fabric round the tin then fix with a couple of lines of hot glue on the short edges, just where the fabric joins. I couldn't photograph this stage, hot glue on a metal tin cools pretty quickly so you need to be quick. Also I have only 2 hands! Here is what it looks like now. The glue is clear so any small bits that ooze though the holes in the fabric don't show too much.
cross stitch planter from an old tin
This tin is not watertight so I've lined it with a piece of thick plastic bag. The plant is still in it's original plastic pot, just dropped into the fancy planter.
I shared some problems I'd had with tins as planters last week here and how I got round them.
After saying last week that herbs were a bit to much work for a windowsill I have backtracked and now have some flat leafed parsley in my Cross Stitch planter. 
recycled tin cross stitch planter
It was from an IKEA set of 3 paper wax lined cups with seeds to grow mint, basil and coriander that I was lucky enough to get as a gift at a baby shower. The mint didn't germinate at all so I just have cups of coriander and basil that are doing rather well at the moment. The IKEA cup fitted perfectly into the tin so for a little while I am actually back to living my dream of herbs on my kitchen windowsill - lovely whilst it lasts!
You might also be interested in:
Felt Heart Brooch
Felt Heart Brooch
Cross Stitch Planters
Ikea Cactus gift wrap
Ikea cactus gift wrap
Taking succulent cuttings
I'll be linking up at these great link parties, why not check them out!

read more

Friday 6 May 2016

Kitchen Tin Planters and a cautionary tale

Old tins make fabulous planters for a kitchen windowsill right?
Kitchen Tin Planters
I guess you would call this up-cycling. It's an idea I'd seen all over pinterest, using old tins as planters, they look great so I thought I'd have a go. I've made mistakes so you don't have to, read on for my cautionary tale...

I actually started with this "vintage" OXO tin. I say "vintage" like that because really it's just a bit old and I'm not sure if it properly qualifies as vinatge. It was a freebie from OXO back in the 80's and was one of the things I kept when sorting out all my mums things. It's kind of cute but very "of it's time" - apparently only white people used OXO cubes in the 80's and am I the only one thinking that guy on the far right looks a bit like Hitler (ooo, far right ... spooky)
Over the last 6 months I've just kept my eye out for red food tins (to go in our red kitchen) and now I have 4 I feel this is enough to share with you.
At first I imagined fresh herbs on my kitchen window sill - how lovely that would be. Turns out herbs are quite a lot of work!
  • they get big quickly
  • they get straggly looking quickly, unless you use them all the time in everything you cook
  • a lot of them are annuals and die off in the autumn
If you use a lot of herbs in your cooking you go for it.
I moved to more of an "any easy to grow" plant theme.

The OXO tin is not water tight so I lined the base of the tin with thick plastic and put a dish in the bottom just to make sure water doesn't get inside. I added a plant still in it's plastic regular pot too. This is one of the babies from when I showed how to take cutting from these succulents.

The next tin I found was the Black Treacle tin, once the treacle was all used up I washed it out and planted it up. I figured this tin was made for liquids so I wouldn't have any problems with it leaking.
Kitchen Tin Planters
I planted it up with soil directly in the tin using some Jade or Money tree babies, also from my plants for free post. It doesn't leak but 6 months on it is going rusty on the bottom: 
Not a massive problem but I'm thinking this might leave rings on a windowsill which could be hard to clean off.
Turns out maybe not everything you see on pinterest is as simple as it seems! 
  • make sure your tin is sealed or waterproof and line it if it's not
  • herbs are lovely but not super easy to look after
  • consider putting regular plant pots inside your nice tins rather than planting directly into them
  • watch out for rusty bottoms!
Luckily the tin I've got that's gone rusty is the easiest to replace, as soon as we've used all the treacle in the next tin I can swap this one out. It would be a shame to use a lovely vintage tin that took ages to find though and then ruin it. 
Kitchen Tin Planters
In the other tins I've settled on a mixture of artificial plants and putting a plastic lining to the tin, with the plant still in it's plastic plant pot. I've not planted directly into any of them.
Kitchen Tin Planters

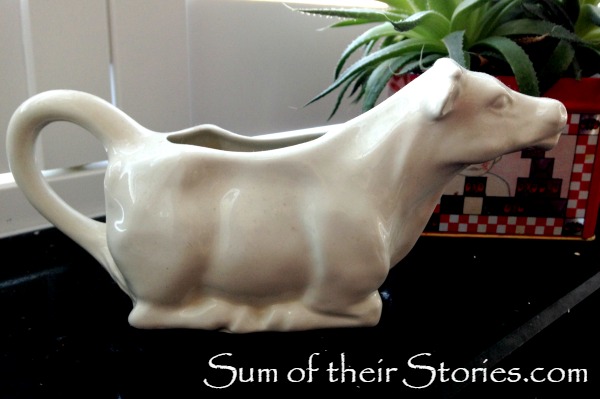
And finally, just because she is rather lovely, here is the cow milk jug that sits on the windowsill with our kitchen tin planters.
cow milk jug
I'm still keeping my eyes open for foods that come in red tins so I can add to the collection. Have you tried using anything unusual as a planter and had any unforeseen problems? 
You might also be interested in:
Plastic tub planter
Plastic tub Planter
Pretty Garden Planters
Ikea Cactus gift wrap
Ikea cactus gift wrap
Taking succulent cuttings
I'll be linking up at these great link parties, why not check them out!

read more